
Recording Vocals Made Easy with the Focusrite 2i2 4th Gen
the Focusrite 2i2 4th Gen is an excellent choice for anyone looking to record vocals with ease and precision. Its high-quality preamps, user-friendly interface, and versatile compatibility make it a top-notch audio interface for both beginners and professionals alike. With the Focusrite 2i2 4th Gen, recording vocals has never been easier.
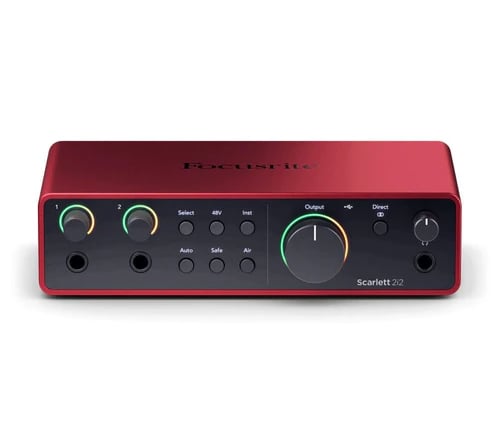
When it comes to recording vocals, having a reliable audio interface is essential. The Focusrite 2i2 4th Gen is a top-notch audio interface that is designed specifically for recording vocals. With its high-quality preamps and low-latency performance, it ensures that every vocal recording is crystal clear and free from any unwanted noise or distortion.
One of the standout features of the Focusrite 2i2 4th Gen is its ease of use. Whether you are a seasoned pro or just starting out, this audio interface is incredibly user-friendly. It comes with a simple and intuitive interface that allows you to easily adjust the input levels, monitor the recording, and control other essential functions.
Another great advantage of the Focusrite 2i2 4th Gen is its versatility. It is compatible with both Mac and Windows operating systems, making it accessible to a wide range of users. Additionally, it works seamlessly with popular recording software such as Pro Tools, Ableton Live, and Logic Pro, giving you the freedom to choose the software that best suits your needs.
When it comes to recording vocals, having a reliable microphone is just as important as having a good audio interface. The Focusrite 2i2 4th Gen provides you with a professional-grade microphone input that ensures the best possible sound quality. It also offers phantom power, which is essential for using condenser microphones, further expanding your options when it comes to choosing the right microphone for your vocal recordings.
In addition to its outstanding audio quality, the Focusrite 2i2 4th Gen also offers a range of useful features that make the recording process even easier. It comes with a direct monitoring feature that allows you to hear your vocals in real-time without any latency. This is particularly useful when recording, as it allows you to hear yourself clearly and make adjustments as needed.
The Focusrite 2i2 4th Gen also comes with a headphone output, which allows you to listen to your recordings privately without disturbing others. This can be especially useful when recording in a home studio or a shared space. Additionally, it offers balanced line outputs, giving you the option to connect studio monitors or other audio equipment for a more professional setup.
In conclusion, the Focusrite 2i2 4th Gen is an excellent choice for anyone looking to record vocals with ease and precision. Its high-quality preamps, user-friendly interface, and versatile compatibility make it a top-notch audio interface for both beginners and professionals alike. With the Focusrite 2i2 4th Gen, recording vocals has never been easier.
The Power of Auto Gain
One of the standout features of the Focusrite 2i2 4th Gen is its Auto Gain function. This innovative feature automatically sets the optimal input level for your vocals, eliminating the need for manual adjustments and guesswork. With Auto Gain, you can simply focus on your performance, knowing that the 2i2 4th Gen will take care of the technical aspects.
Auto Gain works by analyzing the incoming audio signal and adjusting the preamp gain accordingly. This ensures that your vocals are recorded at the perfect level, without any clipping or distortion. Whether you're a seasoned pro or a beginner, Auto Gain simplifies the recording process and helps you achieve professional-sounding results.
With the Auto Gain feature, you no longer have to spend time tweaking the input levels to get the right balance. This is especially useful if you're working in a fast-paced recording environment or if you're recording multiple takes of the same vocal part. The 2i2 4th Gen takes care of all the technicalities, allowing you to focus on your performance and creativity.
Another advantage of the Auto Gain function is its ability to adapt to different vocal styles and dynamics. Whether you're belting out powerful high notes or whispering delicate melodies, the 2i2 4th Gen will automatically adjust the gain to capture your vocals accurately. This ensures that your recordings have a consistent level of clarity and presence, regardless of the vocal style or intensity.
In addition to its convenience and adaptability, the Auto Gain feature also helps prevent clipping and distortion in your recordings. By automatically setting the optimal input level, it prevents the signal from exceeding the maximum capacity of the preamp, resulting in clean and distortion-free recordings. This is especially important when recording vocals with wide dynamic ranges or when using microphones with different sensitivities.
Overall, the Auto Gain function of the Focusrite 2i2 4th Gen is a powerful tool that enhances the recording experience. It simplifies the technical aspects of recording vocals, saves time, and ensures professional-sounding results. Whether you're a singer-songwriter, podcaster, or voice-over artist, the 2i2 4th Gen with Auto Gain is a reliable and efficient audio interface that will take your recordings to the next level.
Safe Mode for Beginners
For beginners who are just starting their journey into recording vocals, the Focusrite 2i2 4th Gen offers a Safe Mode feature. Safe Mode acts as a safety net, preventing any accidental clipping or distortion that can occur when recording at high levels.
When Safe Mode is enabled, the 2i2 4th Gen automatically adjusts the input gain to ensure that your vocals are recorded at a safe level. This helps protect your audio interface and ensures that your recordings are clean and distortion-free. Safe Mode is particularly useful for those who are still learning how to control their vocal dynamics and may not be familiar with setting the appropriate input levels.
Safe Mode is designed to give beginners peace of mind while they are getting familiar with the recording process. It takes away the worry of accidentally damaging their equipment or ending up with distorted recordings. With Safe Mode enabled, beginners can focus on their performance and creativity without having to constantly monitor the input levels.
Another advantage of Safe Mode is that it allows beginners to experiment with different vocal techniques without the fear of ruining their recordings. They can try out different singing styles, dynamics, and vocal effects, knowing that the input gain will be automatically adjusted to keep their vocals within a safe range.
Furthermore, Safe Mode is not only beneficial for beginners but can also be useful for experienced vocalists who are working in unpredictable recording environments. For example, if you are recording in a space with fluctuating noise levels or if you are using a microphone with varying sensitivity, Safe Mode can help maintain consistent recording levels and prevent unexpected clipping or distortion.
In addition to the automatic gain adjustment, the 2i2 4th Gen also provides visual feedback to indicate when Safe Mode is active. This allows users to easily identify whether their input levels are being controlled by the feature. The combination of automatic gain adjustment and visual feedback ensures that beginners have a seamless and user-friendly experience when recording vocals.
Overall, the Safe Mode feature of the Focusrite 2i2 4th Gen is a valuable tool for beginners who want to dive into recording vocals without worrying about technicalities. It provides a safety net that protects their equipment, prevents distortion, and allows them to focus on their performance. Whether you are just starting your recording journey or working in unpredictable environments, Safe Mode is a feature that can enhance your recording experience and give you the confidence to explore your vocal abilities.
Setting up the Focusrite 2i2 4th Gen
Getting started with the Focusrite 2i2 4th Gen is a breeze. Here's a step-by-step guide to help you set up your audio interface for recording vocals:
Connect the 2i2 4th Gen to your computer using the included USB cable.
Install the necessary drivers and software from the Focusrite website.
Connect your microphone to one of the XLR inputs on the 2i2 4th Gen.
Open your preferred recording software and select the 2i2 4th Gen as the input device.
Enable the Auto Gain feature if desired.
Adjust the headphone and monitor levels to your preference.
You're now ready to start recording your vocals!
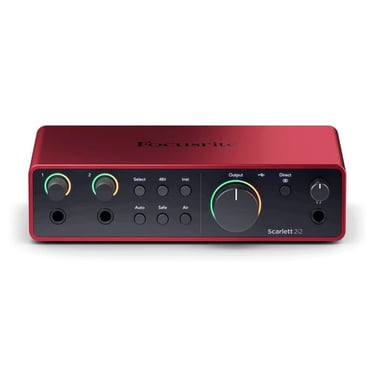
The Focusrite 2i2 4th Gen is a versatile audio interface that offers high-quality recording and playback capabilities. It is designed for musicians, podcasters, and content creators who require professional-grade sound. With its two XLR inputs, you can connect microphones, instruments, or line-level sources to capture your audio with exceptional clarity and detail.
Once you have connected the 2i2 4th Gen to your computer and installed the necessary drivers and software, you can start recording your vocals. The included USB cable ensures a stable and reliable connection, allowing you to focus on your performance without any interruptions.
Before you begin recording, it is important to select the 2i2 4th Gen as the input device in your recording software. This ensures that the audio from your microphone is routed through the interface and into your computer. The 2i2 4th Gen is compatible with a wide range of recording software, making it easy to integrate into your existing setup.
If you prefer to have the interface automatically adjust the gain for your microphone, you can enable the Auto Gain feature. This feature analyzes the incoming audio and adjusts the gain level accordingly, ensuring that your recordings are neither too quiet nor too loud. However, if you prefer to have manual control over the gain, you can disable this feature and adjust the levels yourself.
The 2i2 4th Gen also features headphone and monitor outputs, allowing you to monitor your recordings in real-time. You can adjust the headphone and monitor levels to your preference, ensuring that you can hear yourself and your backing tracks clearly while recording. This is particularly useful for vocalists who need to hear their own voice while performing.
With the Focusrite 2i2 4th Gen set up and ready to go, you can now start recording your vocals with confidence. Whether you're working on a professional recording or a personal project, the 2i2 4th Gen provides the tools you need to capture your vocals with exceptional quality. So go ahead, hit that record button, and let your voice be heard!
Tips for Recording High-Quality Vocals
While the Focusrite 2i2 4th Gen makes recording vocals easier, there are still some tips and techniques you can follow to ensure the best possible results:
Choose a suitable recording environment: Find a quiet space with minimal background noise and good acoustics to capture clean vocals.
Position the microphone correctly: Experiment with microphone placement to find the sweet spot that captures your vocals accurately.
Use a pop filter: A pop filter helps reduce plosive sounds (such as "p" and "b" sounds) that can cause distortion in recordings.
Warm up your vocals: Spend a few minutes doing vocal warm-up exercises to ensure your voice is in top shape before recording.
Experiment with microphone distance: Moving closer or further away from the microphone can affect the sound and dynamics of your vocals.
Consider using headphones: Monitoring your vocals through headphones can help you catch any imperfections or issues during recording.
Take breaks: Recording vocals can be physically and mentally demanding. Take regular breaks to rest your voice and ears.
Experiment with post-processing: Once you've recorded your vocals, try applying EQ, compression, and other effects to enhance the sound.
Pay attention to room treatment: In addition to finding a suitable recording environment, consider treating your room to minimize unwanted reflections and improve the overall sound quality. This can be done by using acoustic panels, bass traps, and diffusers to control the sound reflections in the room.
Use proper microphone technique: Learn and practice proper microphone technique to get the best out of your vocals. This includes maintaining a consistent distance from the microphone, avoiding sudden movements, and using proper microphone handling techniques.
Consider using a reflection filter: If you are recording in a less-than-ideal environment, a reflection filter can help reduce the impact of room reflections on your vocals. It is a portable device that is placed behind the microphone to absorb and diffuse sound reflections.
Record multiple takes: To ensure you capture the best performance, consider recording multiple takes of your vocals. This gives you more options during the editing and mixing process.
Experiment with microphone polar patterns: If your microphone has selectable polar patterns, such as cardioid, figure-eight, or omnidirectional, try experimenting with different patterns to find the one that suits your vocals and the recording environment best.
Pay attention to microphone gain: Adjust the microphone gain appropriately to avoid clipping or distortion. Start with a lower gain setting and gradually increase it until your vocals are captured at an optimal level.
support@sokheystudio.com